Illusion Engine 07 - ImGui
Introduction
Game engine editors play a crucial role in the development of video games. They provide a graphical user interface for game developers to create and manipulate game assets, such as characters, levels, and environments, without having to write code. The editor acts as a central hub for all of the game’s content and assets, making it easier for developers to collaborate and experiment with different ideas. Additionally, the use of an editor can significantly speed up the game development process.
In order to create an editor in our engine, we choose to use ImGui library to write various windows of the editor. ImGui library has already been included in Illusion/Lib/imgui… folder and configured in premake.lua file. (The configuration of third-party library is in article Preparation)
Implementation
Essentially, we want to create an editor interface that does not logically belong to the content of the gameplay level, instead it belongs to the debug level, so we want it to be rendered at the end. The Overlay Layer mentioned above can just meet this requirement. Therefore, we can first write an ImguiLayer, which is specially used to put Imgui-related rendering logic.
Before we actually code the ImGuiLayer class, we have to define a macro to enable ImGui. To make the header file clearly, we put the defination of this macro in a single cpp file. Thus, Inside Illusion/src/Engine/ImGui/… folder, create a file called ImGuiBuild.cpp and enter:
1 | |
After that, we are supposed to use ImGui library as usual. Inside the same folder, create two files ImGuiLayer.h/.cpp, and enter:
ImGuiLayer.h:
1 | |
- ImGuiLayer is inherited from Layer Class so that it could be pushed into the layerstack and be updated and rendered as overlay layers.
ImGuiLayer.cpp:
1 | |
- OnAttach() function basically just sets up the render environment for ImGui.
- Begin() and End() controls the rendering environment for ImGui. We can submit data after Begin() and the ImGui windows would be rendered by calling End();
- OnImGuiRender() is where we bind and update everything that is related to the editor or debug windows. It would be called between Begin() and End().
- OnImGuiRender() exists in every layer. The purpose of that is to make sure all layers are able to render their own debug window.
Utilization
In order to put ImGuiLayer into use, we have to revise our Application class:
Application.h:
1 | |
- Here we include the ImGuiLayer class into our engine and then create a pointer that stores our ImGuiLayer.
Application.cpp:
1 | |
- In the constructor of Application, we create an instance of ImGuiLayer and push it into the layerstack;
- In Run() function, we render all the ImGui related window at once by going throught the layerstack and call every layers’ OnImGuiRender() function.
Conclusion
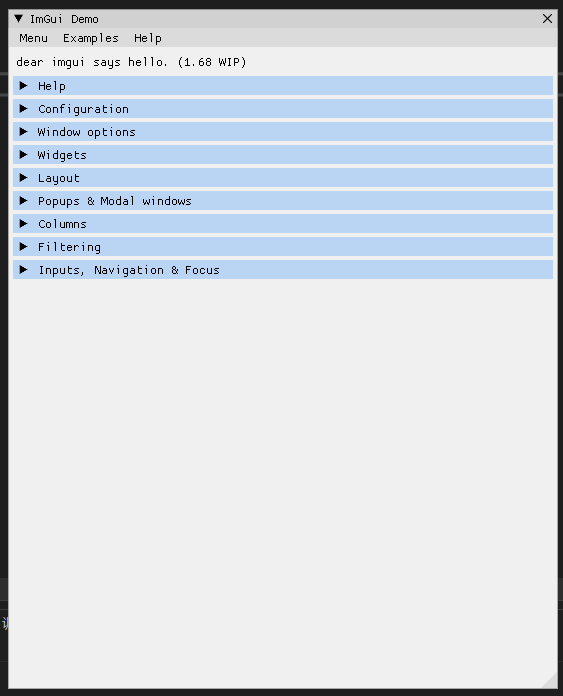
For now, we create a class that enables us to build our own editor in the engine. Temporarily, we can add some code in ImGuiLayer’s OnImGuiRender() function to see the effect:
1 | |
By using such code, a demo window that demonstrates all basic features of ImGui would be rendered
